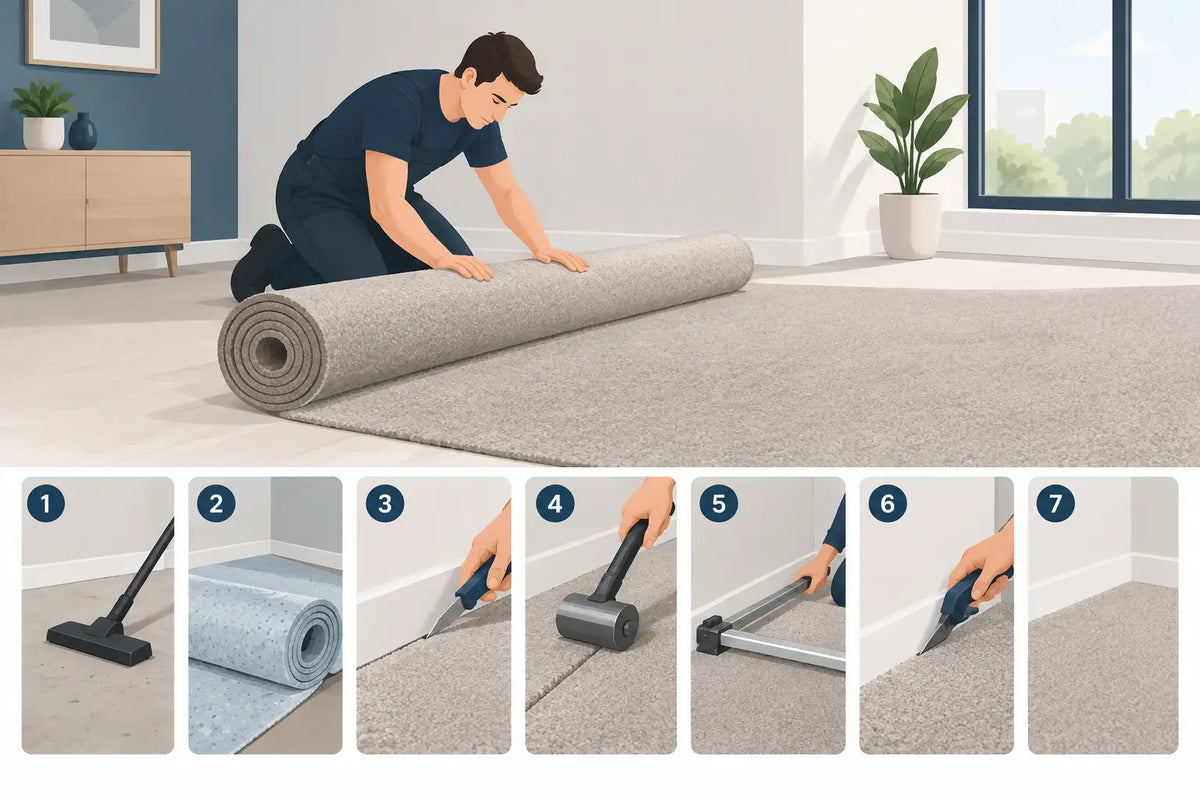
A bedroom that doesn’t feel cold in the morning, a quieter children’s room, and a living room with extra softness underfoot: installing wall-to-wall carpet changes more than just the appearance of a room. The result depends on a level base, accurate measuring, and a neat finish. With the right preparation, you can do a lot yourself. For large rooms, complicated shapes, or seams, professional installation is often the most stress-free choice.
Why choose wall-to-wall carpet?
Fitted carpet immediately gives a room a warm, finished feel. It dampens footstep noise, feels comfortable, and makes a space look calmer because the floor forms one continuous whole. This makes a particularly big difference in bedrooms, upstairs rooms, and children’s rooms. Anyone who likes walking barefoot will also quickly appreciate the comfort.
The choice of material also determines how the carpet performs. A soft, high pile feels wonderfully luxurious, but requires a little more maintenance and is less ideal under a dining table or in a busy passageway. Low-pile carpet is generally easier to vacuum and better suited to intensive use. So don’t think only about the colour and texture, but also about how you actually use the room.
Always measure at the widest point of the room. Take alcoves, doorways, radiators, and a cutting allowance of at least 5 to 10 centimetres on each side into account. Wall-to-wall carpet is often supplied in roll widths. Choosing a smart laying direction can therefore limit material waste and sometimes avoid the need for a seam.
Installing wall-to-wall carpet starts with the subfloor
Even beautiful carpet cannot completely hide unevenness. Small dents, protruding screws, or old adhesive residue can even become visible or noticeable over time. Therefore, make sure the surface is clean, dry, dust-free, and completely level before you start.
A concrete floor must be sufficiently dry. Residual moisture can cause mould, odours, or loosening adhesive. With a wooden floor, first check that all boards are firmly secured and do not creak. Repair loose sections and fill deep gaps where necessary. If the floor has significant height differences, levelling is not a luxury but a necessary step.
The existing floor also makes a difference. Carpet can sometimes be installed directly over a stable, level surface. Over tiles or concrete, many people choose a suitable underlay. This provides extra comfort, helps absorb minor unevenness, and can improve sound insulation. In an apartment, this is particularly pleasant for you and for the neighbours downstairs.
Supplies for a neat installation
Prepare everything before unrolling the carpet. For a simple installation, you will generally need a sharp carpet knife with spare blades, a metal ruler, a tape measure, a pencil, a vacuum cleaner, and sturdy gloves. Depending on the method chosen, you may also need double-sided carpet tape, adhesive, a notched trowel, skirting boards, or gripper strips.
A blunt knife is one of the most common causes of frayed cut lines. It is better to replace the blade once too often than too rarely. Also protect the floor and your hands while cutting, as the material can shift unexpectedly.
Step 1: let the carpet acclimatise
Bring the carpet into the room where it will be installed at least 24 hours beforehand. Leave the roll in a dry room so it can reach room temperature. This prevents the material from noticeably expanding or shrinking after installation, especially in winter.
Then unroll the carpet loosely with the pile direction facing the window or the main source of light. This makes the colour look as even as possible. If a room requires several pieces of carpet, all strips must have the same pile direction; otherwise, colour differences may appear, even when the carpet is exactly the same.
Step 2: determine the correct laying direction
The laying direction is not merely an aesthetic choice. In a long, narrow room, laying the carpet lengthwise can make the space look calmer and larger. In a bedroom, you will often choose a direction in which the pile feels pleasant when you get out of bed.
Also consider the doors. A door must be able to open freely over the carpet. If there is too little clearance, it may need to be shortened. Check this before applying adhesive or tape or replacing the skirting boards.
Step 3: cut generously, never to size straight away
Position the carpet correctly and leave sufficient excess along all edges. Gently press it into the corners without pulling hard. Only then begin cutting it to shape.
Work one wall at a time. Use a putty knife or a blunt tool to press the carpet firmly into the corner between the floor and wall. Then cut along the edge with a sharp knife. It is better to cut in small movements than in one long, uncertain stroke. You cannot repair a cut that is too short, while a few extra millimetres can still be trimmed neatly.
For a heating pipe, first make a small cut from the edge of the carpet to the pipe. Then carefully cut out a curve. Take your time: these are precisely the details that determine whether the floor looks professionally finished.
Step 4: choose a fixing method suited to the room
Loose laying can work in a small bedroom, especially if heavy furniture keeps the carpet in place. However, there is a risk that the carpet will shift or ripple. For a temporary solution or a rental property, double-sided tape along the edges can be a practical compromise, provided the subfloor is suitable for it.
Fully gluing the carpet down is the most secure solution for larger rooms, hallways, and areas with heavy foot traffic. It prevents shifting and helps keep the carpet taut. However, this method requires a carefully prepared subfloor, the right adhesive, and precise workmanship. Once the carpet is in the adhesive, there is limited scope for correction.
Gripper strips are particularly suitable when you want a stretched installation. The carpet is pulled tightly over the strips, often with underlay beneath it. This provides plenty of comfort and an attractive finish, but requires experience and specialist tools. Not sure? Have this method carried out by a professional.
Step 5: finish seams carefully
Sometimes one carpet width is not enough. In that case, a seam is unavoidable. Position the strips so that the seam is as inconspicuous as possible, for example not in the middle of a walkway or directly in the light from a large window.
The two edges must meet perfectly, without overlapping or leaving a gap. With many types of carpet, a professional uses seam tape and heat to make the connection strong and discreet. A poorly finished seam remains visible and may come apart over time. In a large living room or a space with plenty of daylight, professional installation is often the best investment here.
Step 6: install skirting boards and transition profiles
Once the carpet has been cut neatly and secured, finish the edges with skirting boards. They conceal the cut line and immediately give the room a well-finished appearance. Install the skirting boards without trapping or compressing the carpet too tightly.
At a doorway leading to another floor covering, use a transition profile. This protects the edge from fraying and prevents tripping. Choose a profile that matches the colour of your floor hardware or doors, so that the detail blends quietly into the interior.
Step 7: give your new floor a strong start
Vacuum the carpet thoroughly after installation to remove loose fibres and cutting remnants. New carpets may shed some fluff during the first few weeks. This is normal and decreases with regular vacuuming.
Place heavy furniture carefully and, where necessary, use protectors under the legs. This helps prevent deep indentations. Do not drag furniture across the carpet; lift it with assistance. If you do get an imprint in the pile, gently brushing the fibres or treating the area locally with steam according to the material’s care instructions may sometimes help.
For families, a practical colour or subtly mottled design is often a smart choice. Small crumbs, hairs, or footprints are less noticeable on it than on a plain, very light carpet. Anyone wanting to combine style and ease of use will find fitted carpet in various colours, textures, and qualities at Omid Carpets, suitable for every room.
A carefully installed wall-to-wall carpet does not turn a room into a showroom, but into a place you enjoy coming home to. So take your time with the preparation, be precise around the edges, and above all choose a quality that suits your daily life. That way, the floor will remain not only beautiful to look at, but also pleasant to live with for years to come.


Leave a comment
This site is protected by hCaptcha and the hCaptcha Privacy Policy and Terms of Service apply.